

The Art of Pastry Making: A Delightful Journey for the Senses
Pastry making is an exquisite culinary art that has been captivating taste buds and bringing joy to countless individuals for centuries. From flaky croissants to decadent tarts, the world of pastries offers a wide array of delectable treats that are as pleasing to the eye as they are to the palate. Let us take a closer look at this delightful journey for the senses.
At its core, pastry making is a delicate balance between science and creativity. It requires precision, patience, and a deep understanding of ingredients. The process begins with selecting top-quality flour, butter, eggs, and sugar. These fundamental elements lay the foundation for creating pastries that are light, airy, and full of flavor.
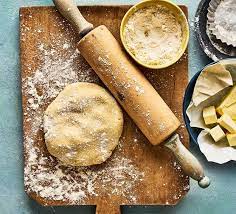
One of the key techniques in pastry making is achieving the perfect dough consistency. Whether it’s a buttery puff pastry or a crumbly shortcrust, getting the texture just right is crucial. This involves carefully measuring ingredients, incorporating them with finesse, and allowing the dough to rest and chill before shaping and baking.
The artistry in pastry making lies not only in technique but also in presentation. Pastry chefs are like skilled painters working with edible canvases. They skillfully create intricate designs using piping bags filled with creams or fillings, meticulously arrange fruits or nuts on top of tarts or cakes, and dust confections with powdered sugar for that final touch of elegance.
But it’s not just about looks; pastries must also tantalize our taste buds. From classic flavors like vanilla and chocolate to more adventurous combinations like lavender-infused creams or tangy citrus curds, there’s something to suit every palate. Pastry chefs experiment with flavors by infusing creams with herbs or spices or incorporating unique ingredients to create unexpected taste sensations.
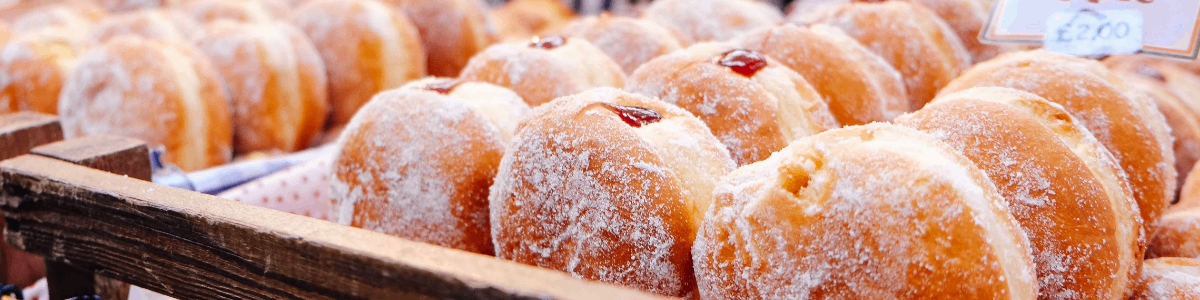
Beyond their visual appeal and delicious flavors, pastries also evoke emotions and memories. A bite into a warm, flaky croissant can transport you to a Parisian café, while a slice of apple pie can bring back memories of cozy family gatherings. Pastries have the power to evoke nostalgia and create moments of pure bliss.
The world of pastry making is not limited to professional kitchens; it’s also an art that can be explored and enjoyed at home. With the right tools, ingredients, and a dash of passion, anyone can embark on their own pastry-making adventure. It’s an opportunity to unleash creativity, experiment with flavors, and share homemade delights with loved ones.
In conclusion, pastry making is an art form that combines technical skill with artistic flair. It takes us on a journey where taste, texture, aroma, and presentation converge to create sensory bliss. Whether you’re indulging in a delicate éclair or savoring a buttery croissant, pastries have the ability to transport us to a world of sweetness and delight. So why not embark on your own pastry-making adventure? Discover the joy of creating edible masterpieces that will leave lasting impressions on those fortunate enough to taste them.
Common Queries Answered: Flour Types, Flaky Crusts, Dough Rolling Tips, Preventing Pastry Shrinkage, Puff vs. Shortcrust Pastry, and Fluffy Choux Pastry
- What is the best type of flour to use for pastry making?
- How do I make a flaky pastry crust?
- What are some tips for rolling out dough evenly?
- How can I prevent my pastry from shrinking in the oven?
- What is the difference between puff pastry and shortcrust pastry?
- How do I make a light and fluffy choux pastry?
What is the best type of flour to use for pastry making?
When it comes to choosing the best type of flour for pastry making, it ultimately depends on the specific pastry you are preparing and the desired outcome. Here are a few common types of flour used in pastry making:
- All-Purpose Flour: All-purpose flour is a versatile option that works well for many pastry recipes. It has a moderate protein content, which helps provide structure to pastries without making them too dense.
- Pastry Flour: Pastry flour is specifically formulated for pastries and has a lower protein content compared to all-purpose flour. This lower protein content results in a more tender and delicate texture, making it ideal for flaky pie crusts, tarts, and cookies.
- Cake Flour: Cake flour has the lowest protein content among these options and is commonly used in delicate cakes and pastries that require a light and tender crumb. It produces soft and fine-textured pastries but may not be suitable for recipes that require more structure.
- Bread Flour: Bread flour has a higher protein content than other types of flour, which makes it ideal for bread-making rather than pastry-making. It provides more gluten development, resulting in chewier and denser textures.
When selecting the best type of flour for your pastry recipe, consider the desired texture and structure you want to achieve. If you prefer a flakier texture, opt for all-purpose or pastry flour. For lighter and more delicate pastries, cake flour might be the better choice. Experimenting with different flours can help you find the perfect balance for your desired outcome.
It’s worth noting that regional variations exist, so specific names or brands of flours may differ depending on your location. Always refer to your recipe’s recommendations or consult with local bakers or culinary experts who can provide guidance based on regional preferences and availability of ingredients.
How do I make a flaky pastry crust?
Making a flaky pastry crust requires a few key steps and techniques. Here’s a basic recipe and method to help you achieve that desired flakiness:
Ingredients:
– 2 ½ cups all-purpose flour
– 1 teaspoon salt
– 1 cup unsalted butter, cold and cut into small cubes
– ¼ to ½ cup ice water
Instructions:
- In a large mixing bowl, whisk together the flour and salt until well combined.
- Add the cold cubed butter to the flour mixture. Using a pastry cutter or your fingertips, quickly work the butter into the flour until it resembles coarse crumbs with some pea-sized pieces remaining.
- Gradually add ice water, starting with ¼ cup, and mix with a fork or your hands until the dough comes together. Add more water if needed, but be careful not to overwork the dough.
- Turn the dough out onto a lightly floured surface and gently knead it just enough to bring it together into a smooth ball.
- Divide the dough in half and shape each portion into a flat disc. Wrap them tightly in plastic wrap and refrigerate for at least 1 hour (or overnight) to allow the gluten to relax and the butter to chill thoroughly.
- Once chilled, remove one disc of dough from the refrigerator and let it sit at room temperature for about 5 minutes to soften slightly for easier rolling.
- On a lightly floured surface, roll out the dough into a circle about 12 inches in diameter (or large enough to fit your pie dish).
- Carefully transfer the rolled-out dough onto your pie dish by gently folding it in half or rolling it around your rolling pin, then unrolling it onto the dish.
- Gently press the dough into the bottom and sides of the dish without stretching it too much.
- Trim any excess overhang using kitchen shears or a sharp knife, leaving about ½ inch of dough hanging over the edge.
- At this point, you can either proceed with your pie recipe or blind-bake the crust before adding your filling. If blind-baking, preheat your oven to the specified temperature in your recipe and follow the instructions for pre-baking the crust.
- For added flakiness, you can brush the crust with an egg wash (a beaten egg mixed with a tablespoon of water) before baking.
Remember, the key to achieving a flaky pastry crust is to handle the dough gently and avoid overworking it. The small pockets of butter within the dough create steam during baking, resulting in those desirable layers of flakiness. Enjoy your homemade flaky pastry crust in all your favorite pies and tarts!
What are some tips for rolling out dough evenly?
Rolling out dough evenly can be a bit challenging, but with a few tips and tricks, you can achieve smooth and uniform results. Here are some suggestions to help you roll out dough evenly:
- Start with the right consistency: Ensure that your dough is properly chilled and at the right temperature for rolling. If the dough is too warm, it will stick to the rolling pin and surface, making it difficult to roll evenly. If it’s too cold, it may crack or break. Follow the recipe instructions for chilling or resting the dough before rolling.
- Prepare your work surface: Lightly flour your work surface to prevent sticking. However, be cautious not to use excessive flour as it can alter the texture of your dough.
- Use proper technique: Begin by flattening the dough slightly with your hands before using a rolling pin. This helps distribute the pressure more evenly during rolling.
- Roll from the center outwards: Start in the center of the dough and roll outward in all directions, applying gentle and even pressure. Rolling from the center helps maintain an even thickness throughout.
- Rotate and flip: Periodically rotate or flip your dough while rolling to prevent sticking and ensure even thickness. This also helps maintain a round or rectangular shape, depending on what you’re aiming for.
- Maintain consistent thickness: Use guides like rolling pin rings or dowels on either side of your dough to maintain a consistent thickness while rolling. These guides help prevent uneven spots and ensure an even thickness throughout.
- Take breaks if needed: If you find that your dough is resisting or shrinking back as you roll, let it rest for a few minutes before continuing. This allows gluten in the dough to relax, making it easier to roll out evenly.
- Measure thickness with guides: Use measuring tools like rulers or pastry rulers to check if your rolled-out dough has reached the desired thickness specified in your recipe.
Remember, practice makes perfect. Don’t get discouraged if your first attempts aren’t flawless. With time and experience, you’ll develop a better feel for rolling out dough evenly. Enjoy the process and have fun creating delicious treats!
How can I prevent my pastry from shrinking in the oven?
Preventing pastry from shrinking in the oven can be achieved by following a few key steps during the preparation and baking process. Here are some tips to help you maintain the shape of your pastry:
- Chill the dough: After preparing the pastry dough, refrigerate it for at least 30 minutes or as directed in your recipe. This allows the gluten in the flour to relax and prevents excessive shrinkage during baking.
- Roll out evenly: When rolling out the dough, ensure that it is rolled evenly and to the desired thickness. Uneven thickness can cause uneven shrinkage. Use a rolling pin and gentle pressure to maintain an even surface.
- Use pie weights or beans: For blind baking (pre-baking a pastry crust), line the pastry with parchment paper or aluminum foil and fill it with pie weights or dried beans. These weights will prevent air bubbles from forming and help keep the shape intact while baking.
- Dock or prick the dough: Before blind baking or baking with a filling, use a fork to gently prick small holes on the bottom of the pastry crust. This allows steam to escape during baking, reducing shrinkage.
- Avoid overworking the dough: Handle the dough gently and avoid excessive kneading or stretching, as this can activate gluten formation, leading to shrinkage.
- Maintain proper oven temperature: Preheat your oven to the correct temperature as specified in your recipe. A hot oven helps set and firm up pastries quickly, reducing shrinkage.
- Avoid excessive moisture: Ensure that fillings are not too wet or runny, as excess moisture can cause pastry crusts to become soggy and lose their shape.
- Bake until golden brown: Bake pastries until they reach a golden brown color but avoid overbaking, as this can cause further shrinkage.
By following these tips, you can minimize shrinkage and achieve beautifully baked pastries that retain their shape and texture. Remember, practice makes perfect, so don’t be discouraged if you encounter some shrinkage initially. With time and experience, you’ll become a master at creating perfectly formed pastries.
What is the difference between puff pastry and shortcrust pastry?
Puff pastry and shortcrust pastry are two popular types of pastry used in various sweet and savory dishes. While they both serve as a delicious base for a wide range of culinary creations, there are key differences between the two:
- Ingredients: Puff pastry is made from a basic combination of flour, water, salt, and butter. The unique characteristic of puff pastry comes from its lamination process, where layers of butter are folded into the dough to create multiple flaky layers when baked. Shortcrust pastry, on the other hand, typically consists of flour, fat (such as butter or lard), water, and sometimes sugar or salt. It has a more solid and crumbly texture compared to puff pastry.
- Texture: Puff pastry is known for its lightness and flakiness. The multiple layers of butter within the dough create pockets of steam during baking, resulting in a crisp and airy texture. Shortcrust pastry has a more solid and dense texture due to its higher fat content and lack of leavening agents.
- Usage: Puff pastry is often used for creating delicate pastries like croissants, turnovers, vol-au-vents (hollow cases for fillings), or as a top crust for pies. Its ability to rise dramatically during baking makes it ideal for creating impressive layered pastries with an elegant presentation. Shortcrust pastry is versatile and commonly used as a base for pies (both sweet and savory), tarts, quiches, or even as individual tartlet shells.
- Baking Techniques: Puff pastry requires precise handling to ensure that the layers remain distinct during baking. It typically involves rolling out the dough into thin sheets, folding it over itself several times to create layers, then chilling before use. This process can be time-consuming but results in the characteristic flaky texture when baked properly. Shortcrust pastry is simpler to make, involving the rubbing of fat into the flour until a crumbly texture is achieved, followed by the addition of liquid to bring it together into a dough.
In summary, puff pastry and shortcrust pastry differ in their ingredients, texture, usage, and baking techniques. Puff pastry is renowned for its light and flaky layers, making it ideal for delicate pastries. Shortcrust pastry has a more solid and crumbly texture, making it versatile for both sweet and savory dishes. Both types of pastry offer unique qualities that add depth and flavor to a wide range of culinary creations.
How do I make a light and fluffy choux pastry?
Making light and fluffy choux pastry requires a few key techniques and attention to detail. Follow these steps to achieve the perfect result:
- Gather your ingredients: You’ll need water, butter, flour, salt, and eggs. The ratio is usually 1 cup of water, 1/2 cup of butter, 1 cup of flour, and a pinch of salt for a basic recipe.
- Preheat your oven: Set your oven to around 425°F (220°C) to ensure it’s hot enough when it’s time to bake.
- Prepare the dough: In a saucepan, bring the water, butter, and salt to a boil over medium heat. Once the butter has melted completely and the mixture is boiling, reduce the heat to low.
- Add the flour: Add all of the flour at once to the saucepan and stir vigorously with a wooden spoon until a smooth dough forms. Keep stirring for about 2-3 minutes to cook off some of the moisture.
- Cool down the dough: Remove the saucepan from heat and let it sit for a few minutes until it’s no longer steaming hot. This step helps prevent scrambling the eggs when they’re added later.
- Add eggs gradually: Beat in the eggs one at a time using an electric mixer or by hand until fully incorporated into the dough after each addition. Be sure each egg is well mixed before adding another one.
- Achieve proper consistency: The choux pastry should have a smooth, glossy texture that holds its shape but is still soft enough to pipe easily without being too runny or too stiff.
- Pipe or shape your pastries: Transfer your choux pastry into a piping bag fitted with a large round tip (or use two spoons) and pipe small mounds onto parchment-lined baking sheets, leaving space between each one for expansion during baking.
- Bake with steam: To achieve the desired lightness and puffiness, it’s important to introduce steam during baking. You can do this by placing a small oven-safe dish filled with water on the bottom rack of the oven or spritzing water into the oven a few times during baking.
- Bake and cool: Place your baking sheets in the preheated oven and bake for about 15-20 minutes until the pastries are golden brown and puffed up. Avoid opening the oven door during baking, as this can cause them to deflate. Once baked, remove from the oven and let them cool completely on a wire rack.
With these steps, you’ll be able to create light and fluffy choux pastry that can be filled with creams, custards, or even turned into delightful profiteroles or éclairs. Enjoy your homemade treats!